Acorn Archimedes A3010 IDE Modification
Carrying on from my earlier article on overclocking an A3010, I now look at adding an IDE interface to the A3010 to bring it closer to the capabilities of an A3020. The project has been inspired by munchausen who started a similar project on the Stardot forums though I will be doing it slightly differently.
The A3010 contains some of the components needed to add IDE functionality already. The controller chip is already there. All that is needed is a bunch of signals routing from various parts of the motherboard to a new IDE board which will contain a few missing IC's (HC573, HCT573, HCT14), resistors and capacitors, and all should be good. The original A3010 (plus most other Acorn machines) wiring diagrams and other technical documentation is available on Chris's Acorns site.
Disclaimer
I need to get this out of the way first. I've provided these instructions for others to hopefully use to implement their own IDE interface. This is NOT an easy modification to make. I am NOT responsible for any damage you make to your A3010 whilst attempting this modification. Please only attempt this if you are confident with soldering SMD components and attaching wires to the very fine pitch pins on the ARM250 CPU/Disk controller chips!
Required Connections
As mentioned earlier, I will need to take signals from various parts of the A3010 motherboard and connect them to the IDE board. The connections I need to make are as follows:
- +5V
- GND
From the ARM250 CPU (IC13):
- B!* (Pin 159)
- I!3* (Pin 143)
- Rbe* (Pin 157)
- Wbe* (Pin 156)
- Wb!* (Pin 158)
From the disk controller chip (IC24):
- Hdsc0* (Pin 25)
- Hdsc1* (Pin 26)
- Ior (Pin 44)
- Iow (Pin 45)
- Ided7 (Pin 22)
From the podule expansion slots (SK5):
- BD0-BD6 (Pins 7-13)
- Rst (Pin 15)
From the ROM sockets:
- LA2-LA4
- D8-D15, D24-D31
As you can see that's a lot of connections I need to make! Some of the soldering will be very fiddly work on the ARM250 and disk controller chip due to the very fine pitch of these. These will need extra care when attaching wires to these to ensure I get the right pin and also to not short two pins together.
Parts List
I've provided links for these items on Ebay UK. Please check for alternatives as there are probably cheaper sellers out there!
- IC1-IC2 = RISC OS 3 ROM's (You will already have these!)
- IC3 = HC573
- IC4 = HCT573
- IC5 = HCT14
- R1-R8 = 68 ohm Resistor
- R9-R11 = 33 ohm Resistor
- R12, R17 = 22 ohm Resistor
- R13-R14 = 10K ohm Resistor
- R15 = 4K7 ohm Resistor
- R16 = 220 ohm Resistor (Only fit if you want to overclock the CPU)
- C1, C2, C5 = 100nF Ceramic Capacitor
- C3 = 100nF Ceramic Capacitor (Only fit if you want to overclock the CPU)
- C4 = 100uF Electrolytic Capacitor (After testing this can be left empty)
- C6 = 47uF Electrolytic Capacitor
- X1 = IDE 44-pin Header
- Header Sockets for IC1-IC2 ROM Sockets (The ROM's will sit in these!) = Round Header Sockets (You will need enough for 4 rows x 21 pins)
- Board Mounting Pins (These when fitted will allow the board to be plugged into the existing ROM sockets) = Round Header Pins (You will need enough for 4 rows x 21 pins)
- X2 = DIP 14 Socket (Only fit if you want to overclock the CPU. Remove pins 2,3,5,6,9,10,12,13)
- Kynar
All resistors and ceramic capacitors are of the SMD 0805 size, which can be obtained on the links above. Remember, when using the links above (or your own supplier) to ensure you order the correct size (0805)!
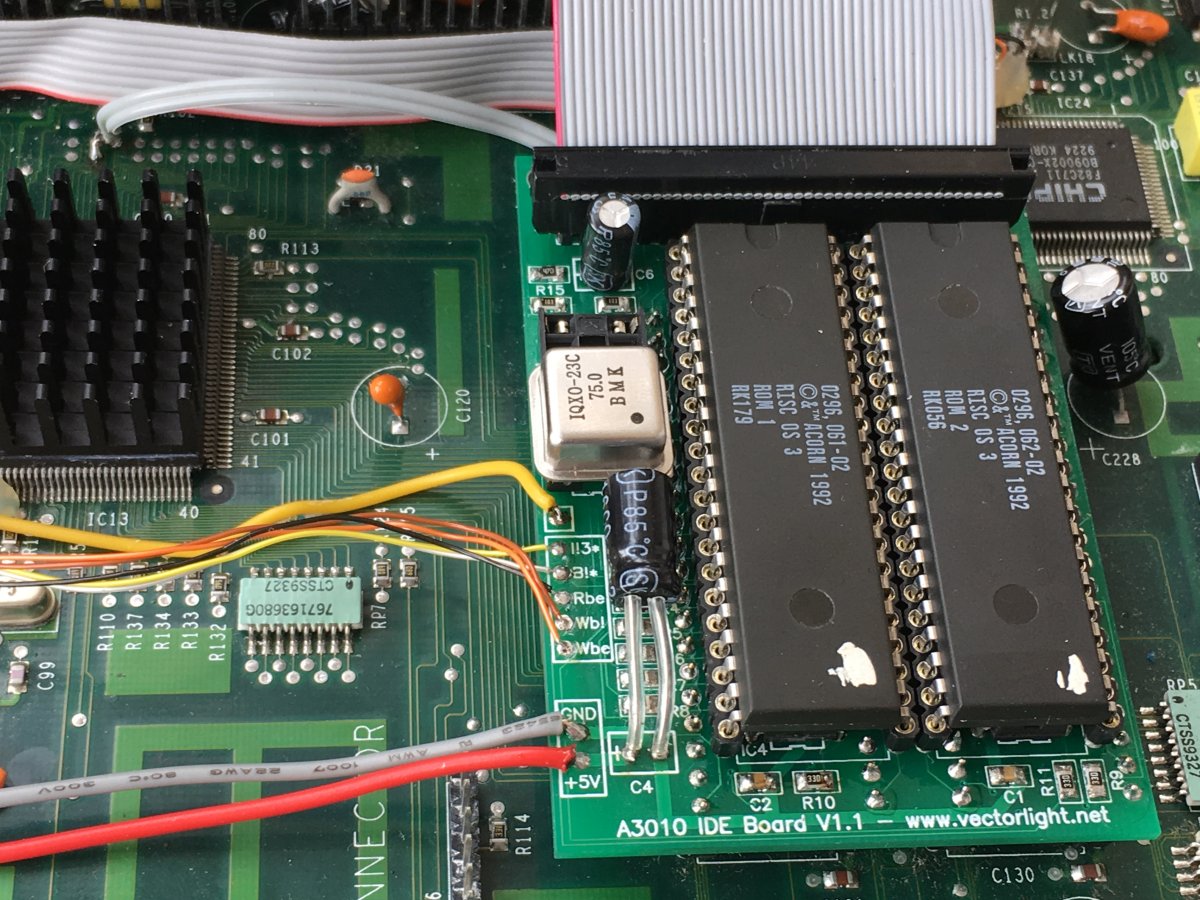
ROM Sockets
To make things as easy as possible the board will be mounted into the existing ROM sockets and the ROMs will plug into my new IDE board. This solution will save me soldering fly leads (19 of them) from the data bus lines (D8-D15, D24-D31), and address lines (LA2-LA4) as these are available directly through the ROM sockets. It should also make the board more reliable as we're not running these signals along potentially long pieces of wire.
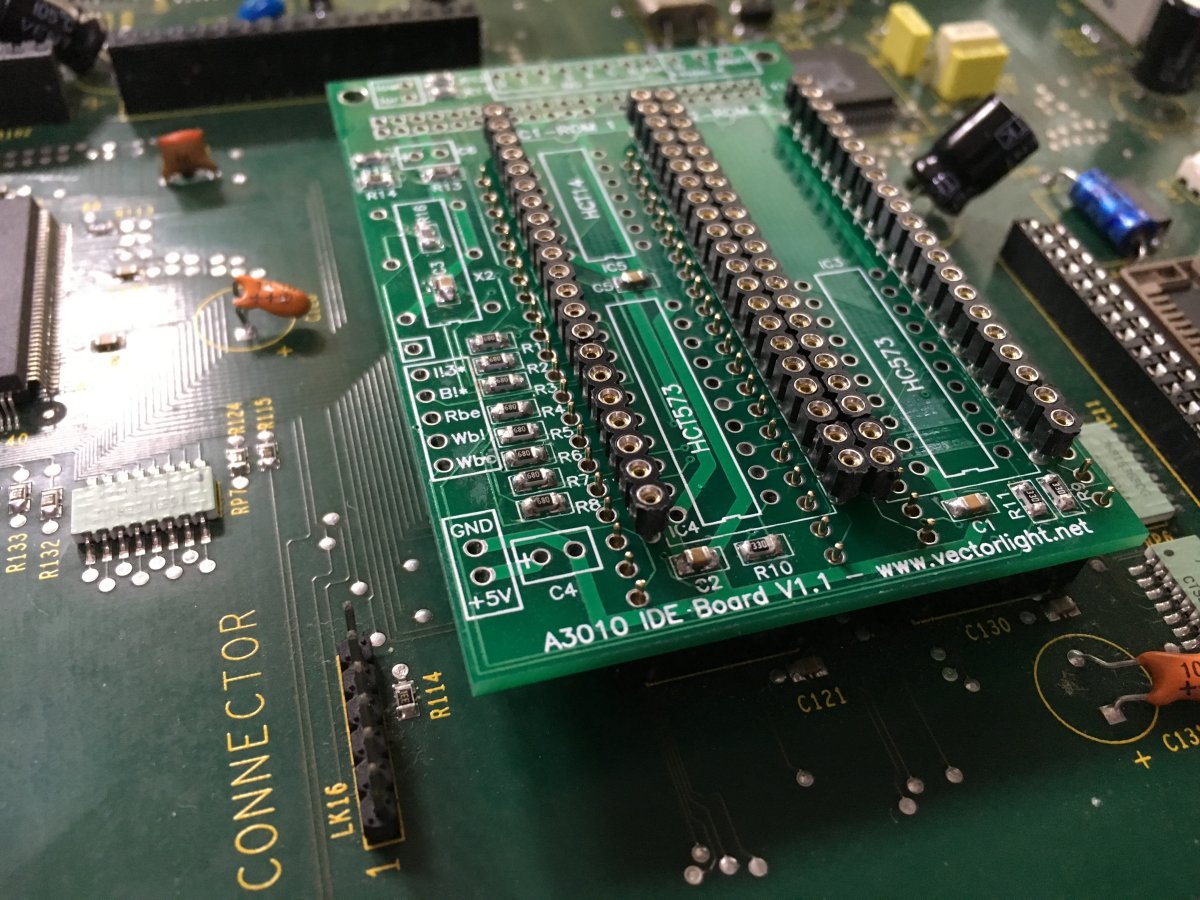
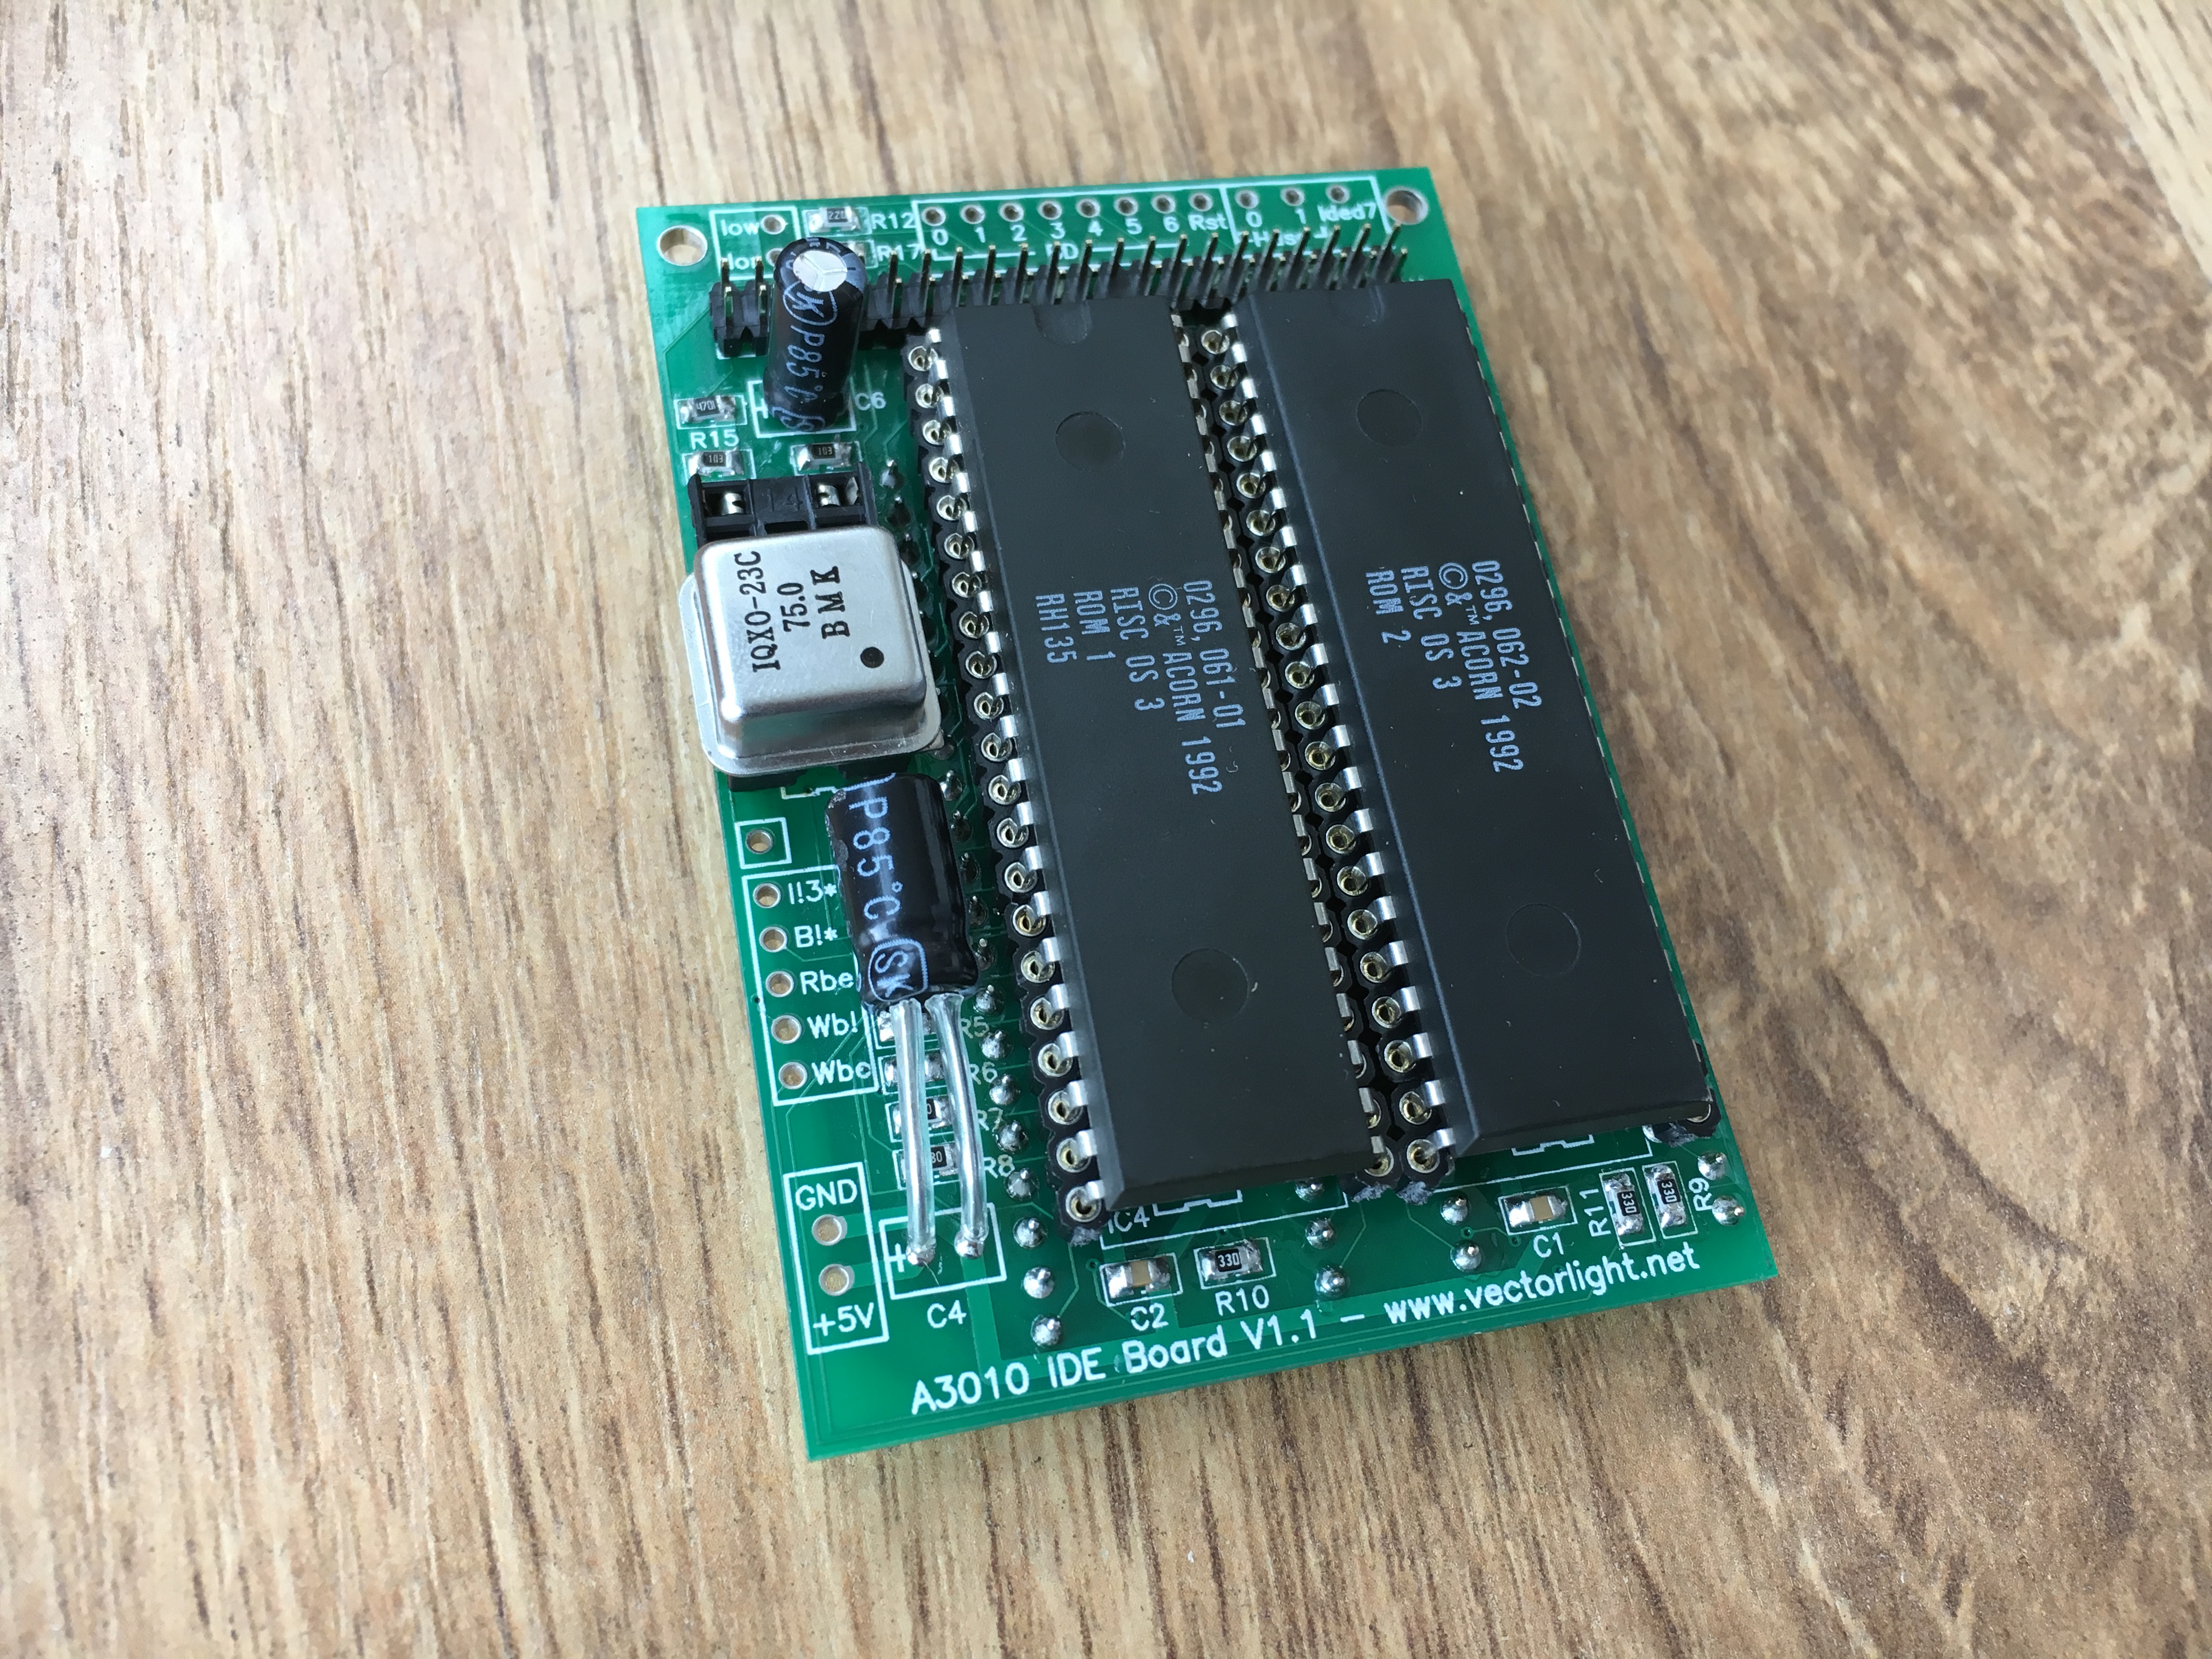
Design - V1.1
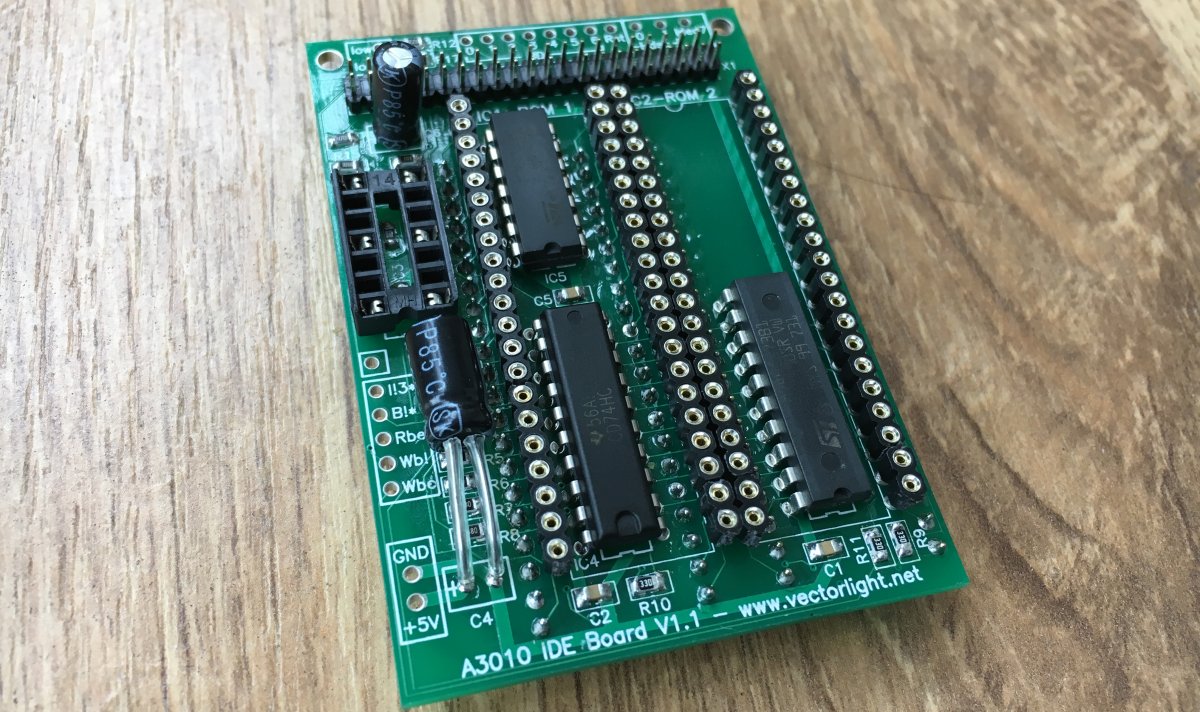
The current design is much smaller than the original. This time I've opted for some SMD components (Capacitors & Resistors) and to save space the 3 ICs are mounted under the socketed ROM's.
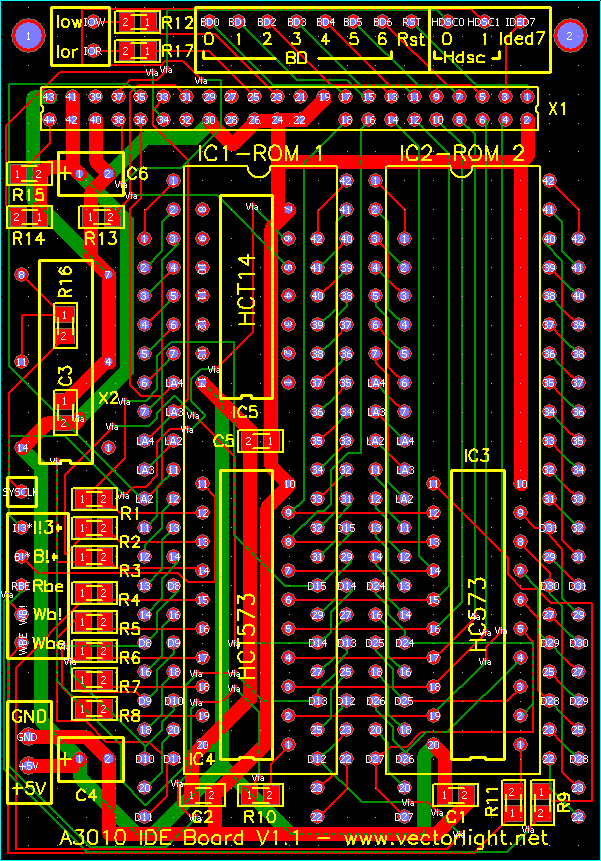
The Board
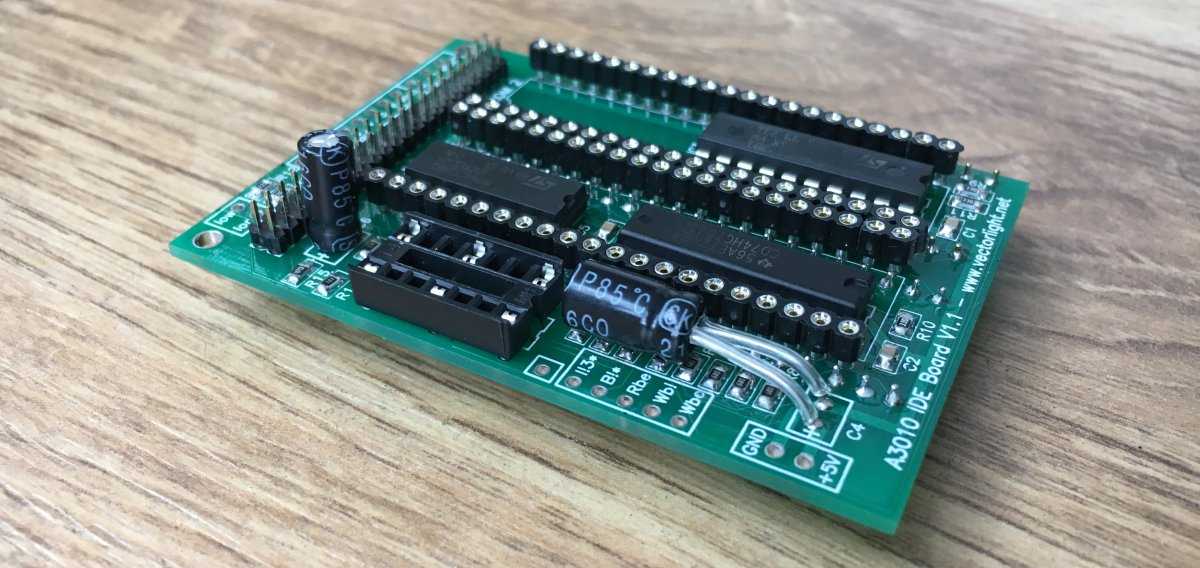
Here is the final board. Lot's of soldering ahead:
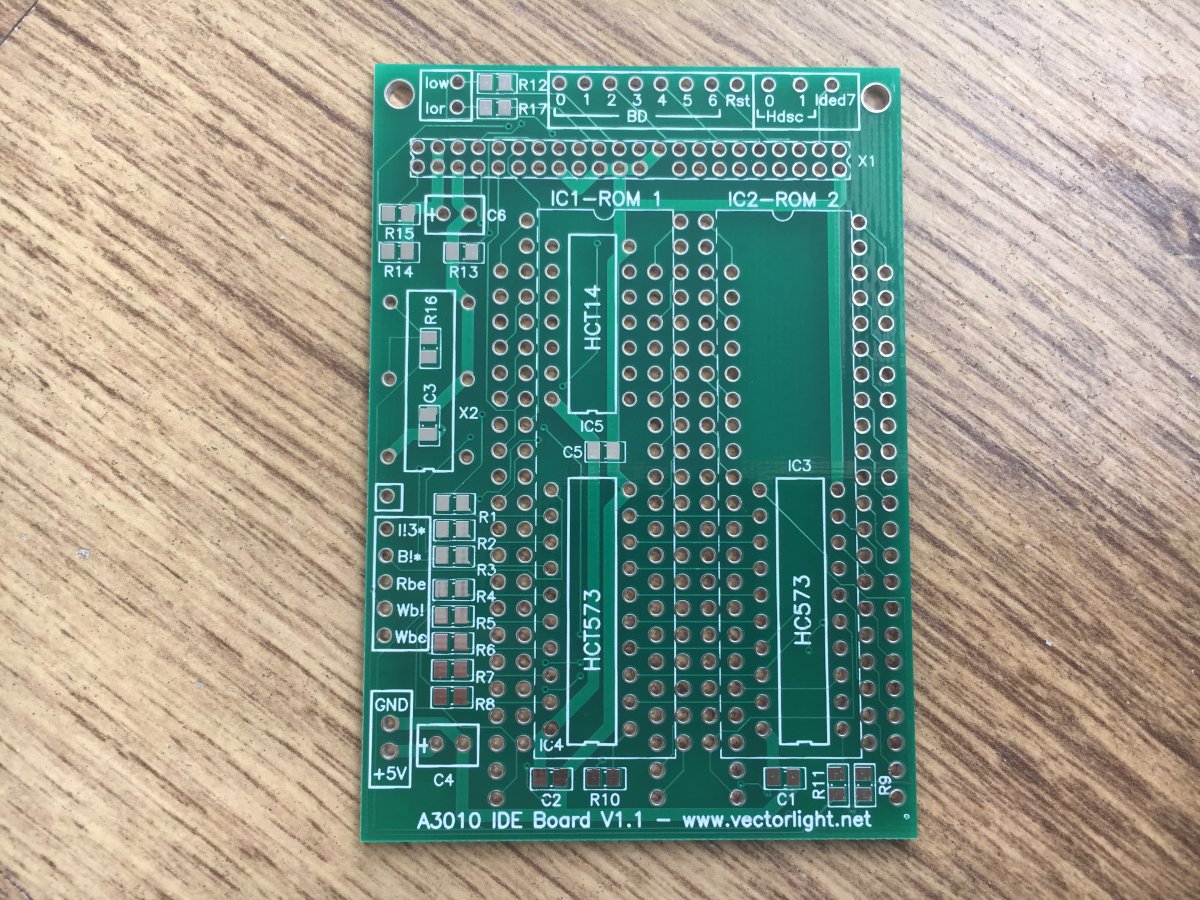
Board assembly step 1:
Solder all the SMD components first.
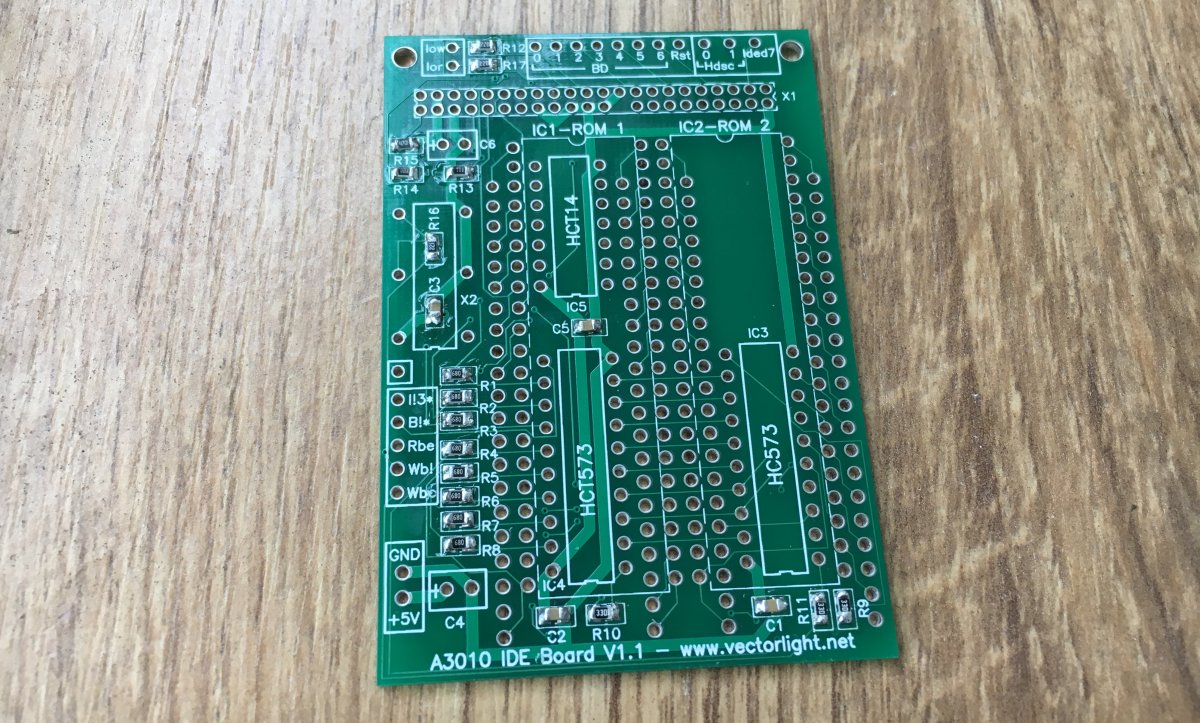
Board assembly step 2:
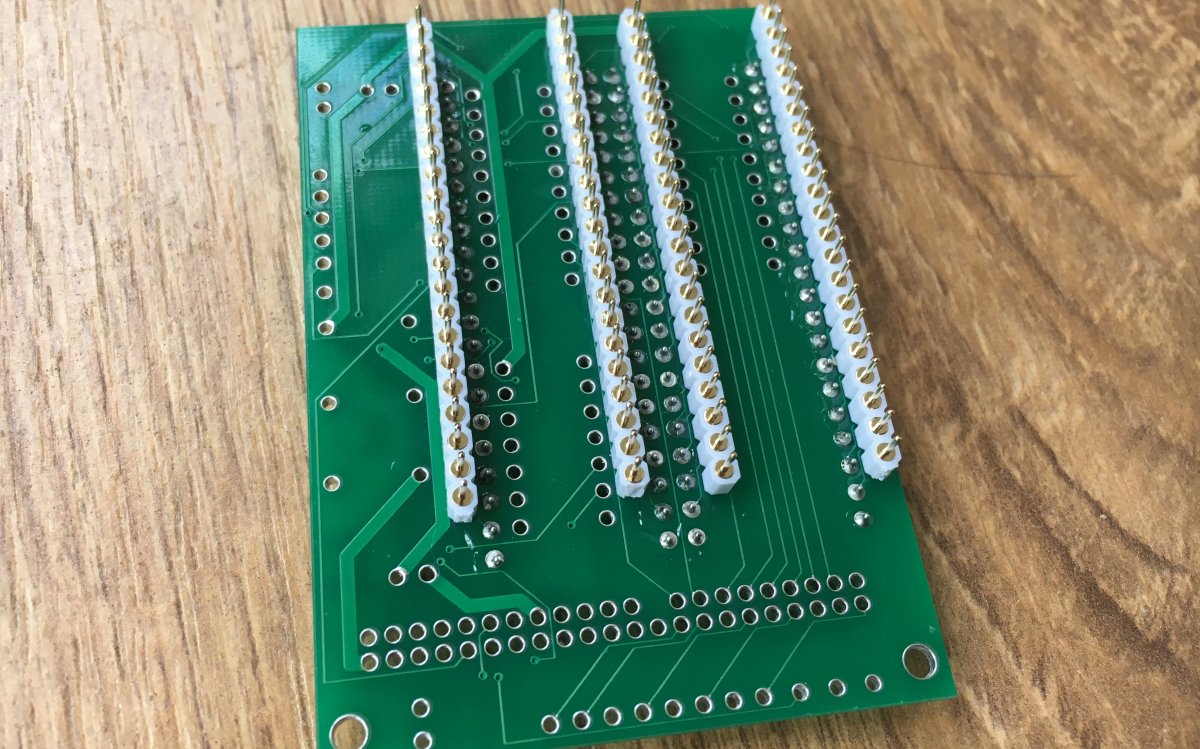
Solder the ROM sockets. I found this easier to do by inserting the 2 RISC OS 3 ROMs into the sockets before soldering and flipping the board over to solder them in place.
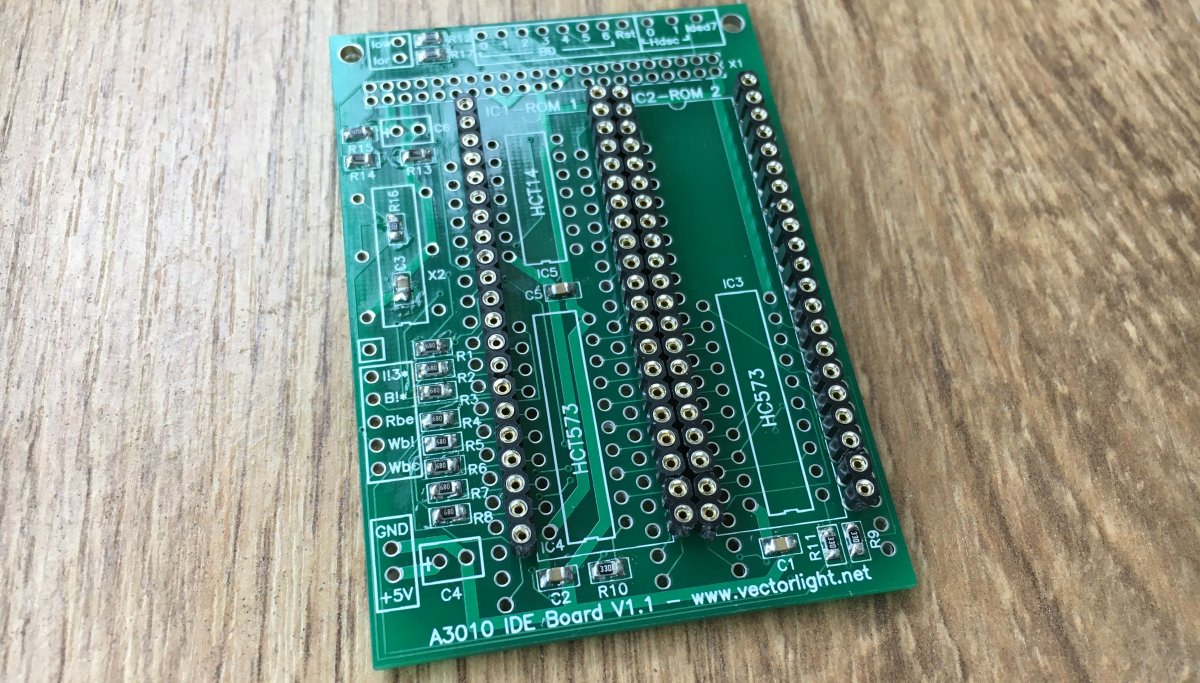
Board assembly step 3:
Solder the connecting pins next. I did this by inserting the 4 pin strips into the ROM sockets on the A3010 PCB and then placing the IDE board on to the pin strips before soldering.
Board assembly step 4:
With the sockets done, now is time to add the remaining thru-hole components. For C4, due to limited space above the board, I have mounted it horizontally and have used heat shrink on the legs of the capacitor.
Making the Connections
Here are images of the A3010 PCB where I have marked up the various points that need to be connected up to the corresponding points on the IDE board.
NOTE: Due to the various different versions of the A3010 PCB, you are advised to double check all these against the A3010 schematics.
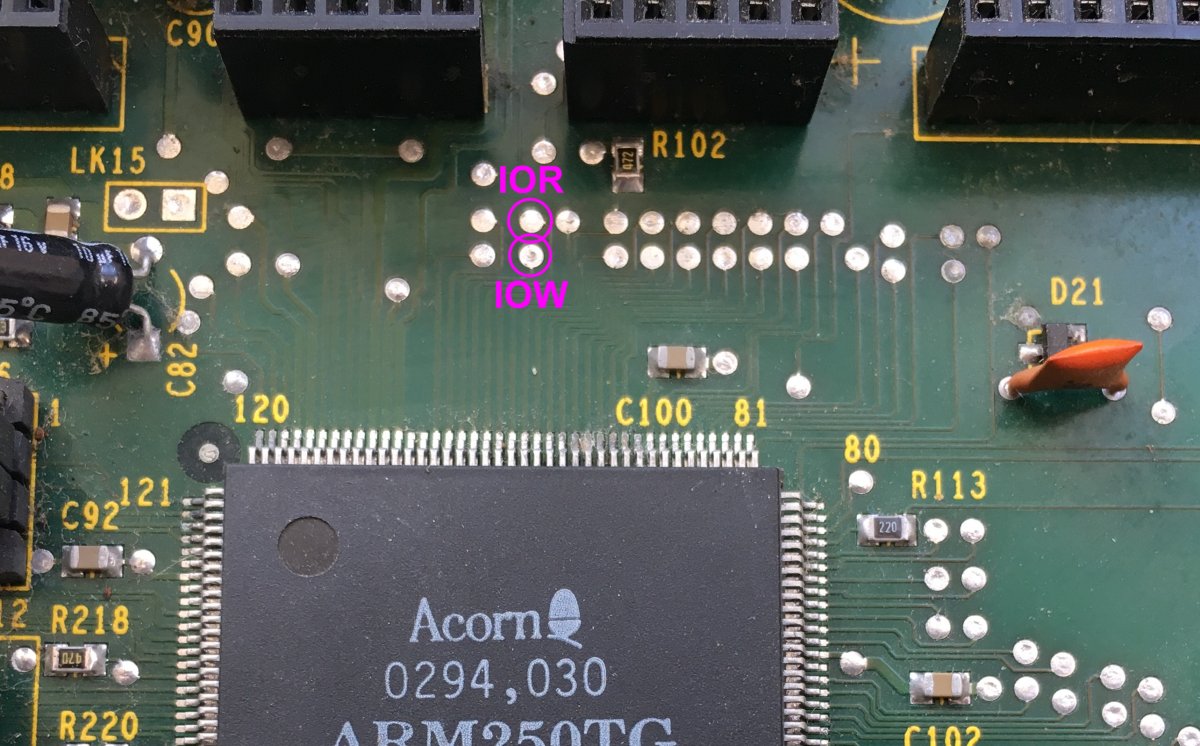
IOR and IOW
First up are these 2 straight forward connections using the marked up vias above the ARM250 CPU:
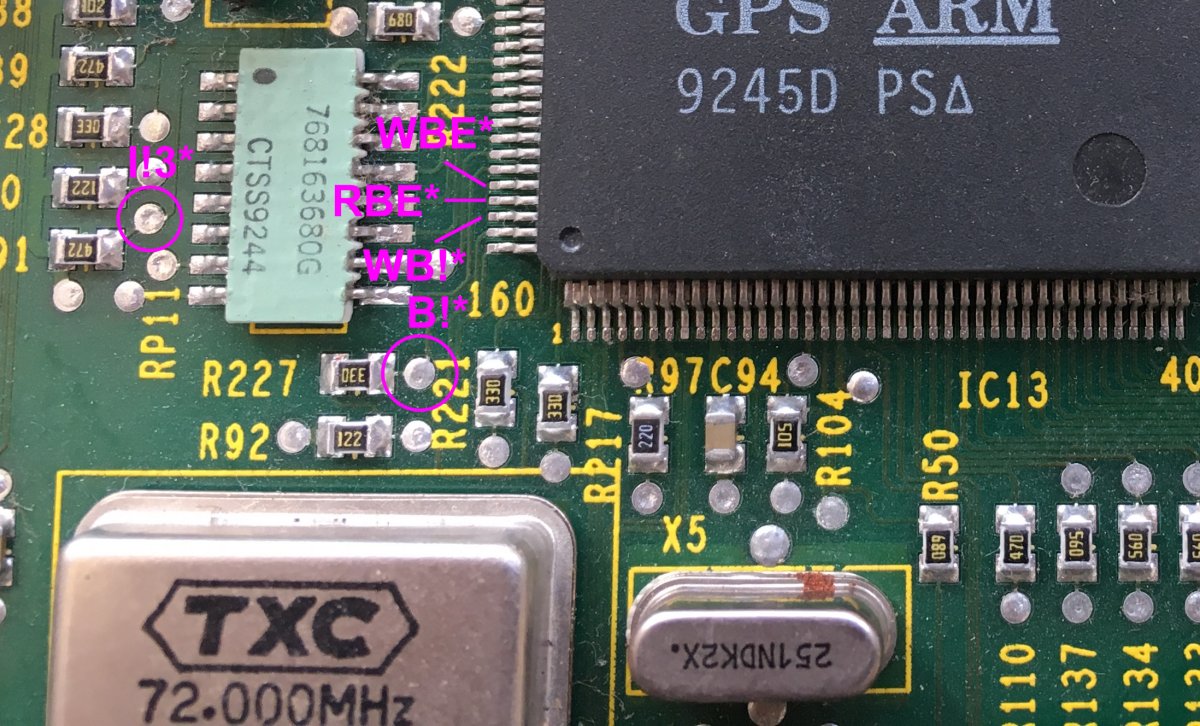
B!*, I!3*, Rbe*, Wbe* and Wb!*
For B!* and I!3* we can use the vias marked up below. For Rbe*, Wbe* and Wb!* we need to attach the wires directly to the pins of the ARM250. You need a very delicate hand here:
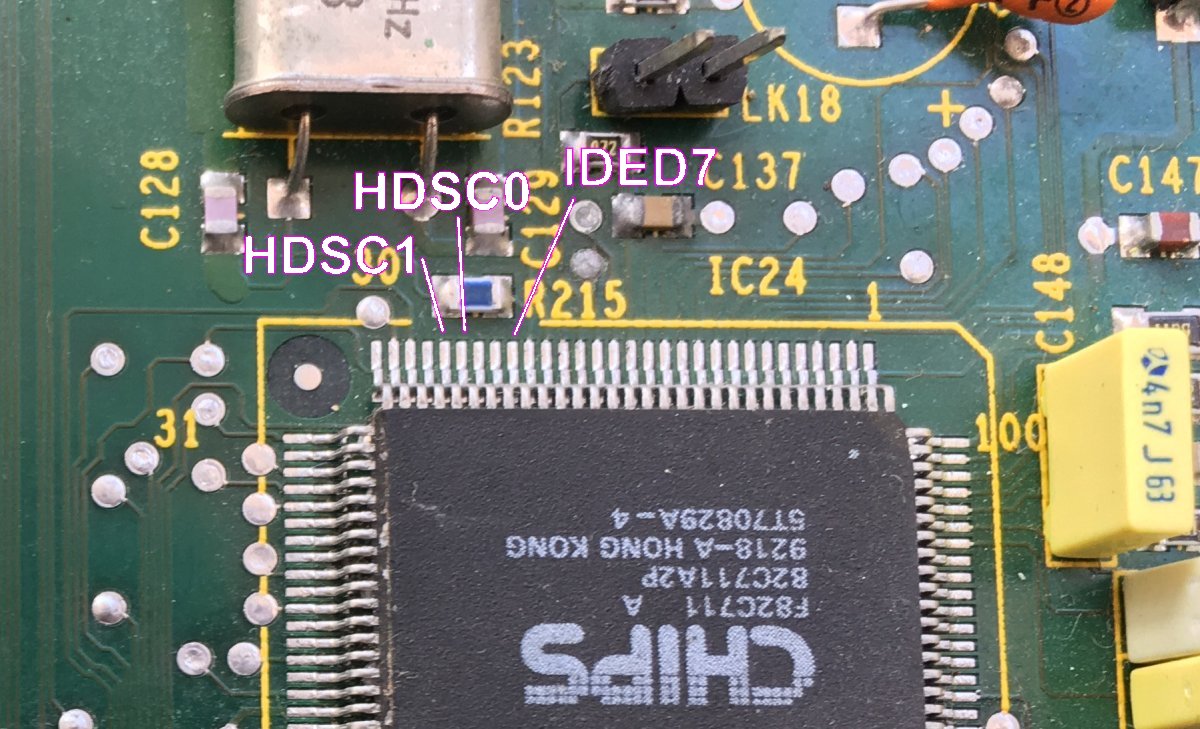
Hdsc0*, Hdsc1* and Ided7
These 3 connections need to be made directly to the pins of the disk controller chip:
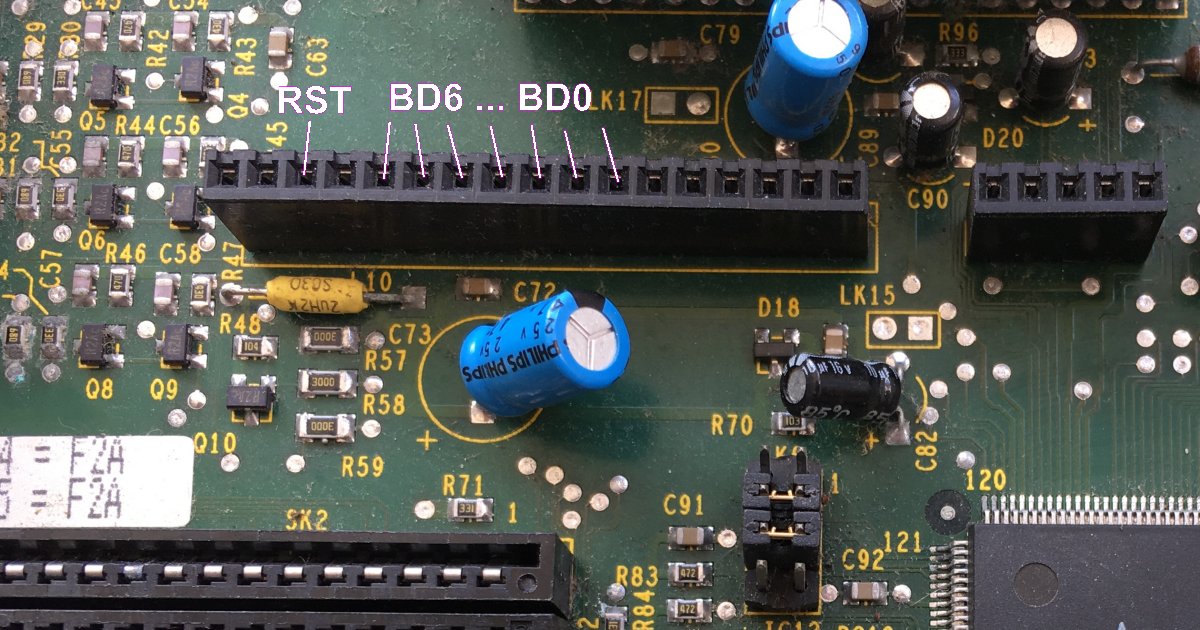
Rst, BD0-6
The remaining connections can be obtained from the expansion podule slot SK5. For this I carefully unsoldered the whole socket and, using ribbon cable, resoldered the ribbon cable under the socket. This kept the length of the cable as short as possible and also allows me to use the expansion podule as normal:
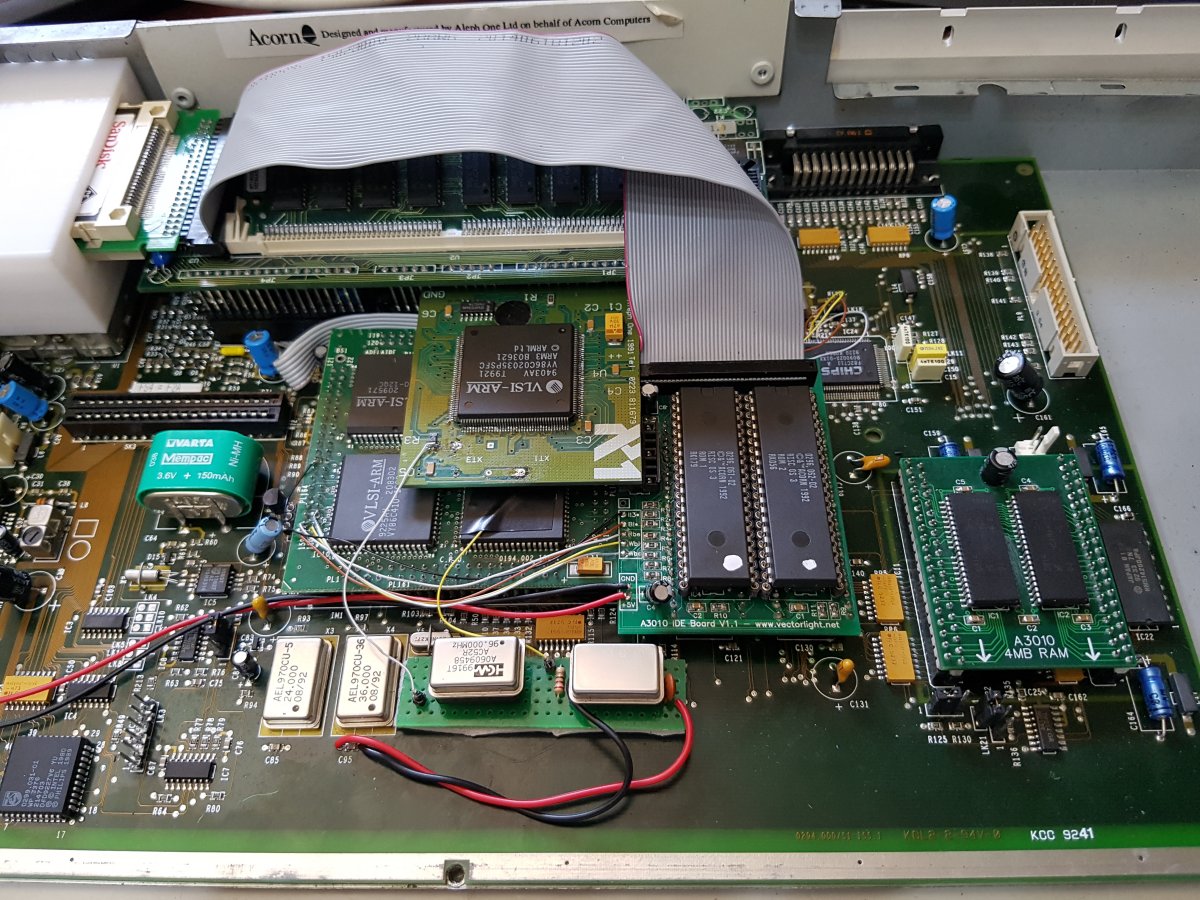
PCB Completed and Installed
My original machine had a DIY socket for a crystal that was mounted on the existing crystal which I used to overclock the CPU/RAM. This is now not needed as I've added space/connections for an additional crystal on the new board. If I wasn't interersted in overclocking the machine this space can be left unpopulated. Overclocking can easily be disabled by simply removing the crystal from it's socket if I want to experience the machine running at its factory speed of 12mhz.
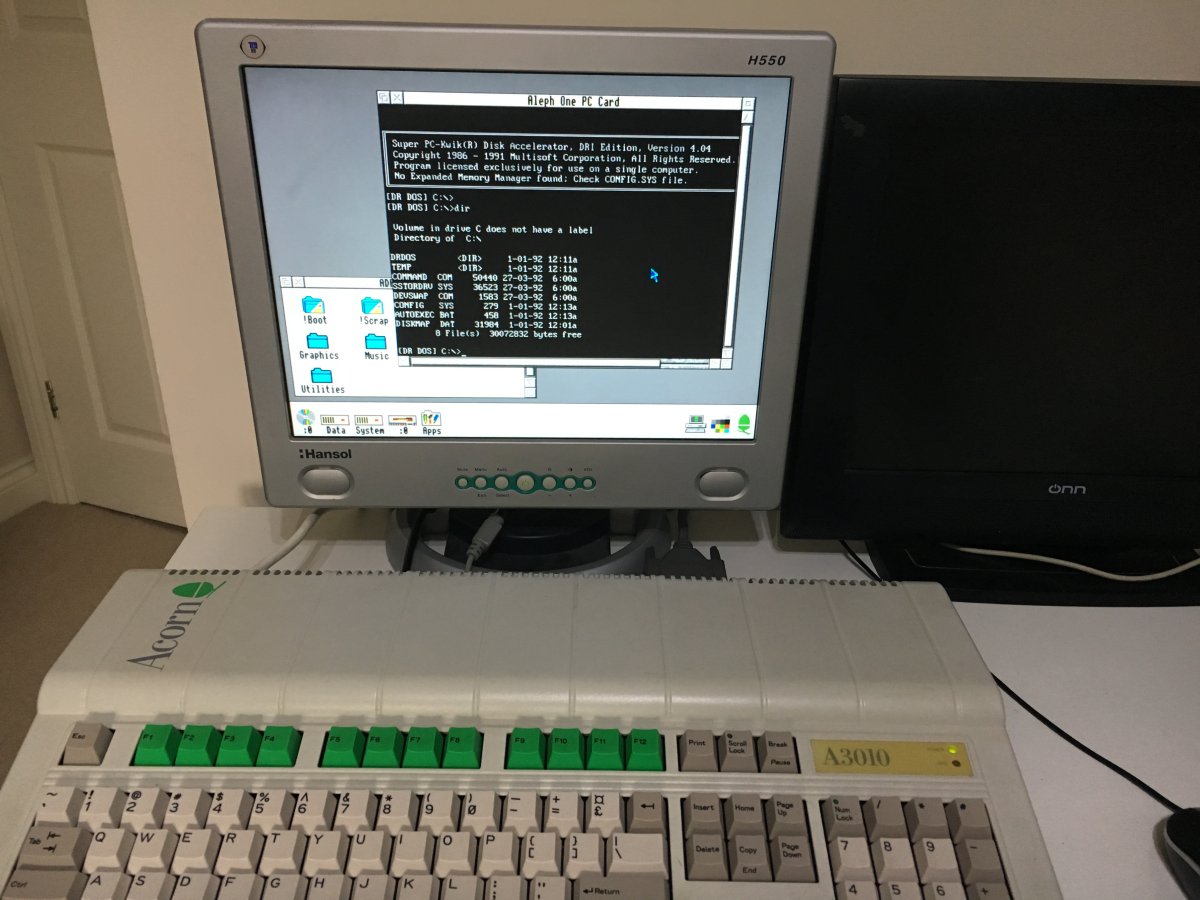
Here it is when the computer is booted up with 2 Compact Flash drives recognised and the PC Card software running to demonstrate the mini-podule is working well. The PC card requires a harddrive to work anyway so this is a great expansion card to use for testing.
Previously you would have needed an A3020 or A4000 to use this card but now with this modification you can also use the humble A3010.
A3010 Adelaide Version?
If you are lucky enough to own an Adelaide version of the A3010 (the one with the ARM2/VIDC/MEMC/IOC all mounted on a daughter board) then it is also possible to do this modification. The IDE board will just about fit. Wiring up the CPU connections is a whole lot easier as you don't have to deal with the fine pitch of the ARM250.
Just to make it more tricky, The Adelaide A3010 I added this modification to also had an ARM3 upgrade so there was also some restrictions on the height of the IDE board. One thing I had to do to make the ARM3 upgrade fit was to file down the end of the IDE-44 cable header that connects to the IDE board. I took about 1mm off the top and also removed the plastic separators on the header pins on the board.
Some ARM3 boards are smaller than mine so this won't always be necessary!
Conclusion
There you have it. An A3010 really can have an IDE harddrive AND an additional expansion in the mini-podule. With this modification we bring the A3010 much closer to the abilities of the A3020 without having to pay A3020 prices! Plus we have the ability to easily overclock the CPU/RAM beyond 20mhz which is something that is tricky on an A3020 provided you have one of the IFEL 4MB upgrades and on top of all that we have joystick ports.
If you have an A3010 and are interested in performing this modification yourself head over to the Stardot A3010 Harddrive modification page.
Guide the car to its parking space in this fun Car Parking game.

Aim for the Trash Can and get the various items of Trash in the bin.
Fly your plane in this colorful vertical scrolling shoot-em-up. Blast the bad guys and collect any bonus's they leave behind.
Pop as many bubbles as possible in this fun and colorful bubble popping game. The levels start off easy enough but gradually get harder!
Here we have a bunch of monsters that need to be matched up. Look out for the bomb and spinning monsters that will cause special damage!

Guide your friendly Bird through the maze of pipes and other obstacles collecting the Stars in this cool arcade game inspired by the legendary Flappy Bird.
You are stranded on an Alien planet. Your goal is to build a space rocket and escape. Start by building units to create power and mine the metal patches. Build defenses to defend your base from the advancing Aliens and Zombies!

Play Pool against the computer or battle against your friends in the online mode!
Slice the fruit that is thrown up onto the screen. Slice the fruit into multiple pieces for maximum points!
Xavier Tardy aka Zarchos wrote:
Thanks.
number-one wrote:
dan wrote:
http://www.stardot.org.uk/forums/viewtopic.php?f=16&t=12884
Steve wrote: